Fidget Spinners
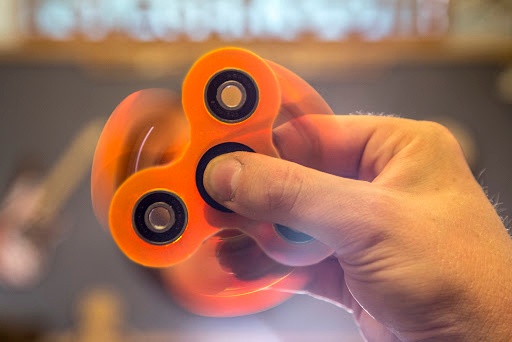
Can't stay still? Make a fidget spinner!

- Safety First: Ensure workspace is free of fire, electrical and other safety hazards. Be aware of all safety issues when cutting materials with a laser. Always have a fire extinguisher on hand
- Power on the laser and all of its components.
- Ensure that:
- The laser is powered and the boot up cycle begins on the screen.
- The cooling system is connected properly and water is flowing through the tube.
- The air compressor is powered and exhausting air to the laser head.
- The exhaust system is on and vented into a safe location. - Connect to RetinaEngrave 2.0 software using your machine’s touch screen to copy the software IP address into your favorite browser. The Wired IP address is displayed at the bottom of your touch screen.
- Import your design and adjust power and speed settings. Double check settings including the number of passes and cut order.
- Insert material into the laser bed. Use the focus tool to adjust to the top of the material. Focusing should be done each time a new material is introduced.
- Use the “Perimeter” function to ensure that the file will fit within the cutting area. Adjust accordingly.
- Run the job file. Do not leave a job running unattended.
CUT
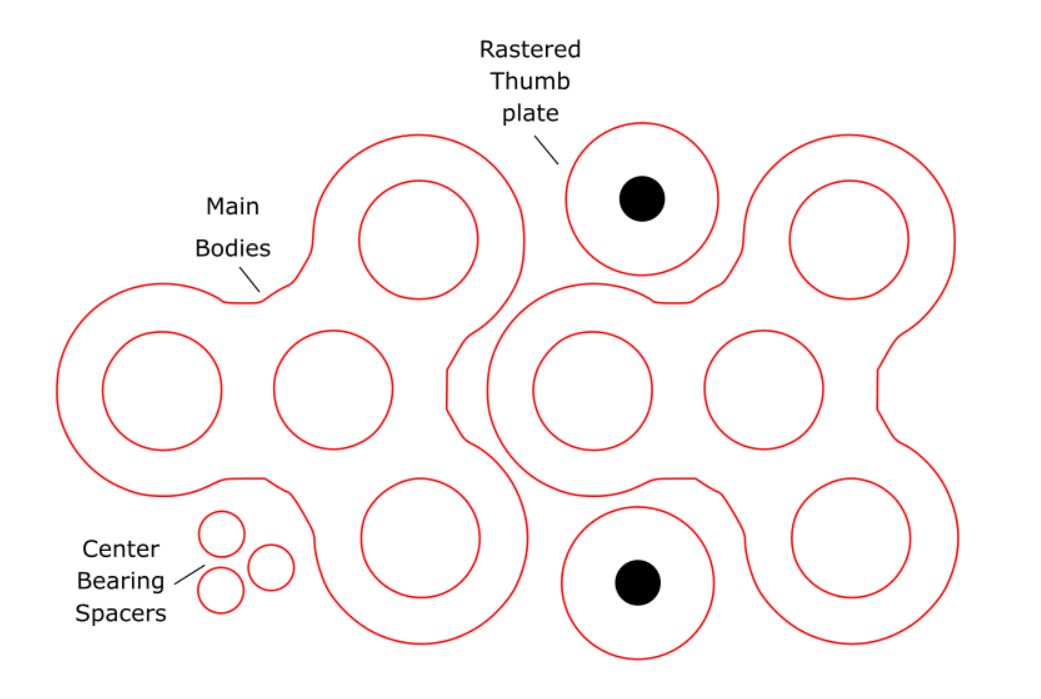
Import the included files and cut all the pieces from their respective materials. This file contains vector cuts, vector markings, and rasters.
Assemble
First you will want to place the bearings in place over the holes evenly.

*NOTE* The bearings used for this project are common 608 skateboard bearings (These can be found at your local skateshop, sports store, or mega stores)

Making sure you are on a flat surface, lightly tap the bearings in place with a mallet or similar tool.
(This tight fit allows no glue to be used if you want to use transparent acrylic like we did)

Now moving forward, you can flip over the spinner, line the other half up, and tap into place as before. Also Seen on Next 2 Slides..

Continue to Next Slide..

Continue to Next Slide..

After the main body is nice and in place, you can do the similar meathod to tap or push the 3 inside spacers into the center bearing.
Make sure after the center spacers are in place that they are equally spaced sticking out of each side.

Finally, you can take the rastered thumbplates and superglue them ontop of the middle spacers. (When running the file you want the raster to create some depth, but not too deep.

Well Done! Your simple fidget spinner is now done!


Continue to the steps for the more complex geared fidget spinner if you dare!
The material specs
- 1/8th'' wood
- 608 bearings (8mm ID, 22mm OD)
-2.5 mm bolts
-2.5 mm nut


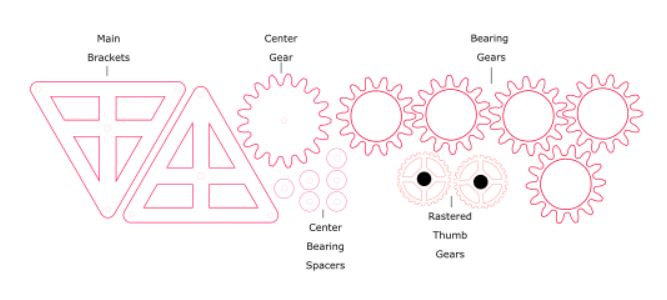
First start by inserting the the center bearing spacers. These should fit snug, if they don't push in a slight tap with a small hammer or mallet will do.

Make sure that there is close to an equal amount sticking out on each side. (this does not have to be perfect)

Now you will want to add the gear around your bearing.

Then you will want to add another gear ring to the top to add thickness. Glue in place once they are both lined up.

Then take one of your main brackets and insert your bolt through the center hole into the main center gear. Do your best to thread the main gear straight and keep it center of the bolt leaving just a small space where the bolt head meets the bracket.

After that is acheived you will want to glue the center gear in place. It is easy to see if it's in the proper area of the bolt if it is laying on a flat surface. Also bolting the surrounding bearing gears in place first will give you a good idea where it should be glued. Also Seen on Next Slide..


Now take the other main bracket and line up the bolts to the holes.

Then you will want to turn the piece around and tighten the bolts via allen wrench. Holding the brackets tight together will ease the tightening of the bolts.

Now you will want to put the center nut on the center bolt. tighten this down leaving just a little space between the nut and the wood bracket. Then super glue the nut in place.

Finally you will want to add the outer rastered thumb gears. This can be glued into place on both side. This gear is where you will hold the spinner as it spins.

Well Done!


Difficulty: ★☆☆ / ★★☆
Minimum Requirements: 40W
Raw Materials: (3mm acrylic, bearings, superglue) or (3mm wood, bearings, glue hardware)
Optional: Paint / Stain
Estimated Laser Time: 2-5 Min (90W)
