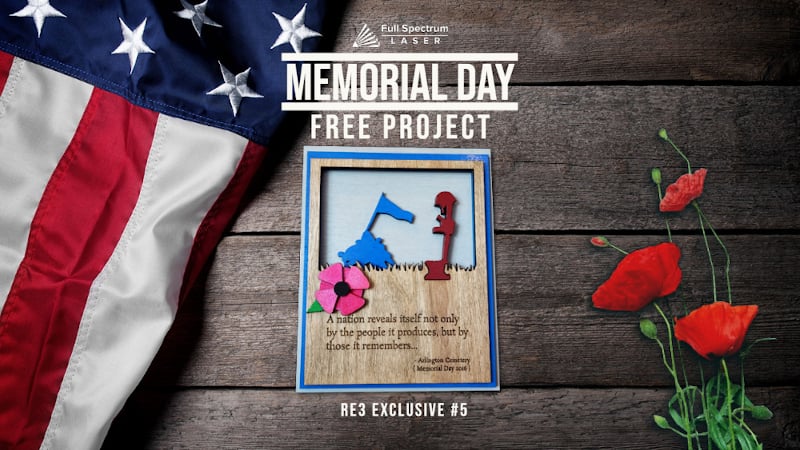
Memorial Day Plaque
RE3 EXCLUSIVE #5
Memorial day is about more than just barbecue and swimming. It's a time to remember and mourn those men and women who have given everything while serving in the armed forces.
You can customize this plaque to include your favorite quote to commemorate this day. The included quote is from the memorial day speech at Arlington Cemetery in 2016. We assembled it using 1/4" birch ply (and the poppy was 1/8" ply), but it can be made using 1/8" ply as well.
- Safety First: Ensure workspace is free of fire, electrical and other safety hazards. Be aware of all safety issues when cutting materials with a laser. Always have a fire extinguisher on hand
- Power on the laser and all of its components.
- Ensure that:
- The laser is powered and the boot up cycle begins on the screen.
- The cooling system is connected properly and water is flowing through the tube.
- The air compressor is powered and exhausting air to the laser head.
- The exhaust system is on and vented into a safe location. - Connect to RetinaEngrave 3.0 software using your machine’s touch screen to copy the software IP address into your favorite browser. The Wired IP address is displayed at the bottom of your touch screen.
- Import your design and adjust power and speed settings. Double check settings including the number of passes and cut order. (It is a good idea to have extra material on hand to run power and speed tests before hand)
- Insert material into the laser bed. Use the focus tool to adjust to the top of the material. Focusing should be done each time a new material is introduced.
- Use the “Perimeter” function to ensure that the file will fit within the cutting area. Adjust accordingly.
- Run the job file. Do not leave a job running unattended.
Assembly Instructions:
- Use some sand paper to remove any sharp edges.
- Paint or stain the layers and make sure they dry completely before moving on to assembly
- Assemble the poppy separately, and glue it on as the final touch.
- Glue the layers together. Wood glue works best, but you can use super glue or some thin double sided tape rated to work with wood.
- After everything is assembled and the glue is completely dry, you can use a sawtooth hanger to put this on a wall, or use a tabletop easel to display it on the shelf.

We would love to see your creations. If you have created this project and would like to share it with us, make sure to tag us on Facebook and Instagram using the #MadeWithFSL hashtag!

Difficulty: ★ ☆ ☆
Estimated Laser Time: 12 Minutes
Minimum Requirements:
- 40W - 45W for 3mm
- 75W - 150W for 5mm
Raw Materials:
- 1/4" Birch Plywood (5mm) or 1/8" Birch Plywood (3mm)
- Wood Glue
- Paint/Stain
Optional:
- Sawtooth frame hanger (to hang on the wall)
- Tabletop display easel (for display)
