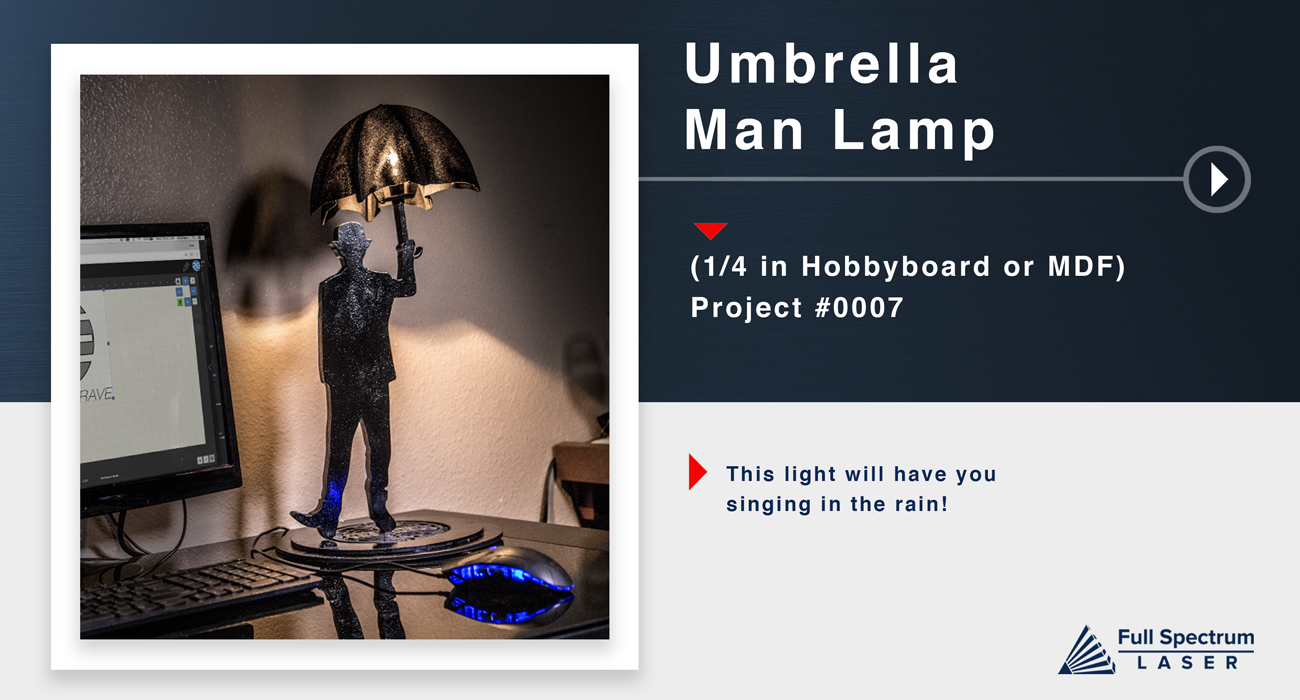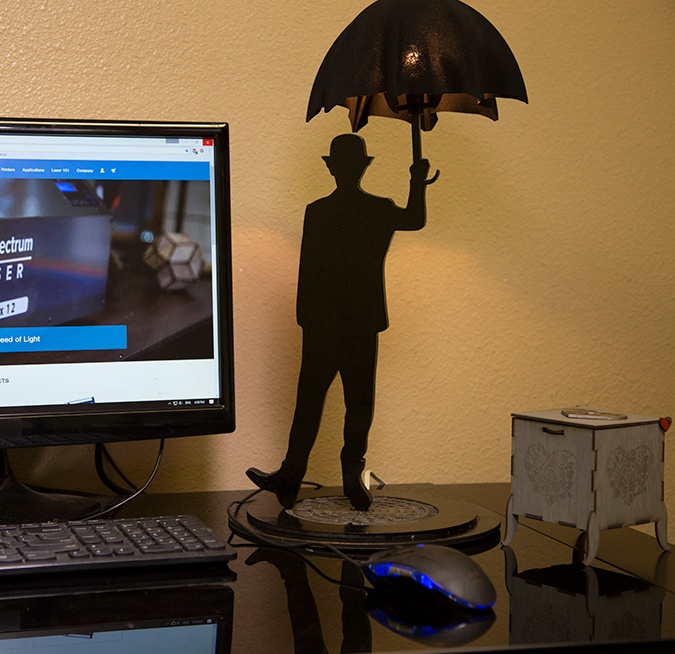
Wattson The Umbrella Man Lamp
Hail, Wattson the umbrella man lamp.

- Safety First: Ensure workspace is free of fire, electrical and other safety hazards. Be aware of all safety issues when cutting materials with a laser. Always have a fire extinguisher on hand
- Power on the laser and all of its components.
- Ensure that:
- The laser is powered and the boot up cycle begins on the screen.
- The cooling system is connected properly and water is flowing through the tube.
- The air compressor is powered and exhausting air to the laser head.
- The exhaust system is on and vented into a safe location. - Connect to RetinaEngrave 2.0 software using your machine’s touch screen to copy the software IP address into your favorite browser. The Wired IP address is displayed at the bottom of your touch screen.
- Import your design and adjust power and speed settings. Double check settings including the number of passes and cut order.
- Insert material into the laser bed. Use the focus tool to adjust to the top of the material. Focusing should be done each time a new material is introduced.
- Use the “Perimeter” function to ensure that the file will fit within the cutting area. Adjust accordingly.
- Run the job file. Do not leave a job running unattended.
CUT
Import the included files and cut all the pieces from their respective materials. This file contains vector cuts, vector markings, and a single raster.
Assemble
First, you will want to take one of the complete silhouette cuts and place the one with the cut out for the cord on top. This cut out gives you a channel to hide the chord of the light fixture.

We suggest using wood glue and clamps to create the best bond for both pieces.

Once glued you will want to string the bracket on to cord until it goes to the bottom of the small light fixture then run the power cord down the channel to the exit the foot.

After the cord is where you will want it, the other silhouette cut out can be glued ontop. (Wood glue and clamps suggested for best outcome)

We can now move onto the umbrealla structure using the 8 notch bracket and inserting the 2 bracket umbrella ribs across from one another.

Continue to add the rest of the ribs of the umbrella that arent apart of the two piece bracket. There is also a small arrow shaped piece that inserts into the top of the umbrella.

At this point it will be good to paint all of the pieces. We chose to paint this project mostly black to give it the silhouette look. Feel free to do the same, or brighten it up to look like a painting from Peter Max. Also Seen on Next Slide..


After the paint dries, string the chord through the top panel of the base and run it through the bottom base's channel out the back. (the two base cuts can be glued prior to this step, or after).

While running the cord through you can now insert Wattson into the base.

Now you can move on to the umbrella portion of the fixture and start gluing and stretching the fabric in place. (choosing fabric that has good stretching properties is best for the cut of the fabric, and the application) We used a black polyester.

Start the process of gluing the fabric in place on one rib end, then moving onto gluing the fabric to the next rib end directly across.

Continue this process until you have glued all 8 edges to the tip of the ribs.

Finally you will want to screw in your lightbulb and attach the unbrella bracket to the double notched bracket at he bottom of light fixture itself.

Well Done!


Difficulty: ★★☆
Minimum Requirements: 40W
Raw Materials: 1/4" Wood, Glue, Small Light Fixture Socket and Cord, Light Bulb and Fabric
Optional: Paint
Estimated Laser Time: 50 Min (45W)
