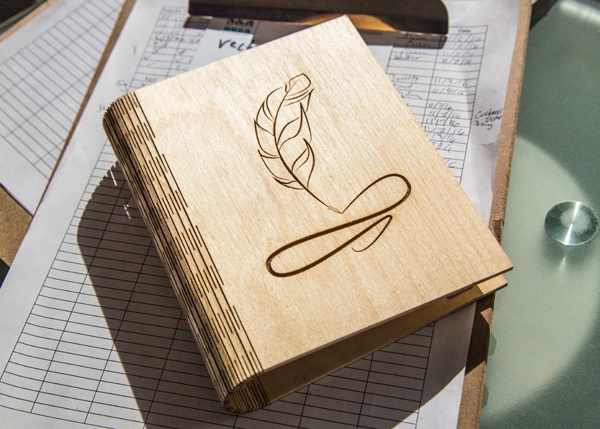
Creating Flexibility with Kerf
Kerf refers to the amount of material that is removed when cutting. As opposed to the width of a saw blade or a drill bit, a laser has a very small kerf. By using strategic placements of these thin lines, we are able to increase the bendability of materials such as wood tremendously to create bendable hinges and curves. In this lesson, we'll utilize kerf bending to create a notebook that we can open and close.

Safety First
Before powering on your laser, ensure that your workspace is free of fire, electrical and other safety hazards. Always be aware of all safety precautions when cutting materials with a laser.
Verify that your laser is connected to a computer by using the included ethernet cable.
For any additional setup or troubleshooting, reference your user manual for details
Launch Software
When the boot cycle completes, locate the unique IP address for your machine. For Muse, the wired IP will be listed in the bottom right corner of the touchscreen. To access the wireless IP, go to Settings>Network. For all other machines, use the IP address that appears in the main screen after the boot cycle.
Type this unique number into any web browser. We recommend Google Chrome for best results.

Step 1
Import
Begin by importing the included "Notebook" file as vector only. This book can be customized by importing your design and positioning it within right panel. The "Quill" file has been included, but we encourage you to customize this with your own unique file.
Step 2
Cut
Select a setting that will cut the red, then pink paths. Focus to your material, jog, and cut. When cutting many sections of a piece of material, we reccomend using materials such as solid woods, acrylics, or other whole materials. When cutting materials such as plywood, it's likely that you will hit an air pocket where there is no glue, and may affect the rigidity of your product.

Step 3
Assembly
Carefully fold you book into it’s proper shape. This should bend easily, but depending on the material, may have some stiffness.

Use elastic or another stretch item such as rubber bands to create the notepad strap. Tie this between the two vertical opening.

Use a second elastic to create a closure strap. Loop this through the remaing opening. On the inside of the cover, put the strap under the notepad strap. Secure this with a knot.

Fold the covers of the notepad together, and slide the cardboard sections under the horizontal strap.

Close the cover by pulling the elastic strap over the front.
What We Learned
- What is Kerf?
- Kerf is the amount of material lost when cutting.
- How does kerf allow us to bend materials like wood?
- Wood has a slight flexibility. By cutting in specific areas, we're able to maximize it's flexibility.
- Why might this technique be difficult to produce on plywoods?
- Plywoods may not always be solid and may include air pockets that create fragile points.
Materials:
1/8" Wood
3"x5" Notepad
Rubber Bands
(Optional) 1/4" Elastic
Things to think about:
- What is Kerf?
- How does kerf allow us to bend materials like wood?
- Why might this technique be difficult to produce on plywoods?
